Archive for the 'How To' Category

Sruti Box Hacking aka X-Spirituaahl Sound Hacks


Background
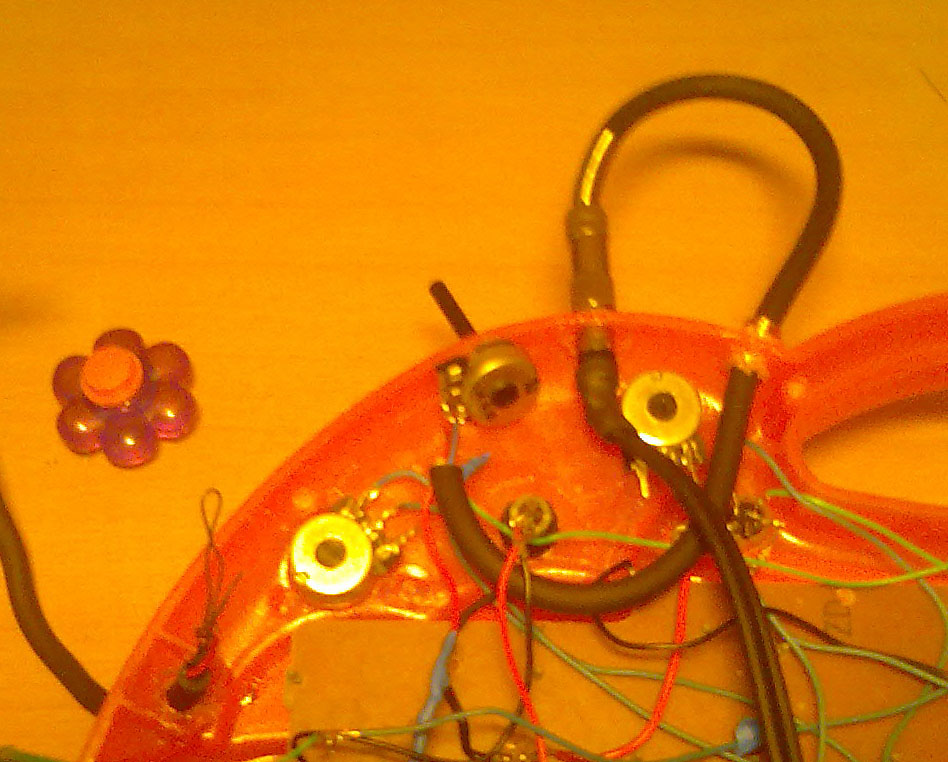
After my visit to Bangalore, jamming with Yashas, shopping cheap electronic gadgets on the streets and some experiments on the beach in Goa, i finally got really inspired to work on some new musical instruments. The Gmoettophon MK2 is still with me, but i thought I could use some new noises, this time its spirituaaahl. At every corner in the streets of india you can buy these little divine "mantra chanting boxes" ... ooooohhhhmmmm navashivaaaa ganapathiiiii, just a few rupees, and maaaany tunes 9in1 at least! They are super easy to hack, they come with a speaker, a nice little plastic case, a 220VAC plug and inside an AC/DC converter (uiuiuiui indian electronics loooks daaaangerous), this is then powering the little sound chip (seems that one is made in china). On the board is as usual one resistor for the clock, which already allows to bring the mantras directly into the noise of hell. A few other connections can be made, eg to the LED output or the speaker, generating weird echoes and distortions... Naaaiiice.

Upcoming Workshop with Keith Lam, Hong Kong
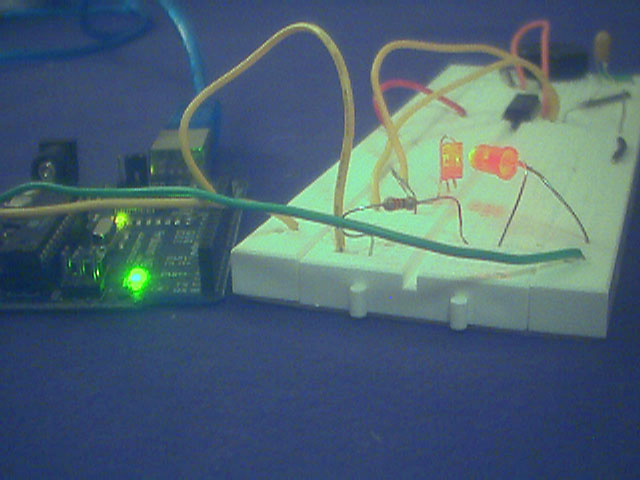
After talking for hours with Keith about workshops, OpenSpaces, Hackerscenes etc, we decided that we have to do a workshop in Hong Kong before I fly back to Zurich. Said and decided, so we are looking forward for the one and only, first time ever "X-Spirituaahl Sound Hacks" workshop, combining the easy hackable mantra boxes with some local sound toys, buddha machines and maybe even some musical souvenirs from indonesia. We plan an introduction into simple music toy hacking for making experimental and noisy tunes, first steps into lo-fi electronic circuits needed to expand the hacked circuitry with oscillators and amplifiers and most of all having fun hacking!

Details about where and when will be posted soon, see the SGMK wiki for more info...

1, 2, 3, 4 Noise-Mantra hacks already done...
While the first mantra chanting box hacks we made in Goa at the beach, new ones have already seen the light of day. And the first thing to do in the new year, make some new toys. Instantly the appartement's coffeetable at Jalan Wora Wari, where I stay during my residency at HONF, was turned into a hacklab...

Radel - Mantra Hybrid Hacks

How to make Kilju (FIN) - Randenstyle


From How to make Kilju (finnish homemade wine) in Hagen, posted by Marc Dusseiller Dusjagr on 6/21/2011 (22 items)

Generated by Facebook Photo Fetcher


New Animals and hacked PS3 Eye microscope

Easy modification of a Playstation 3 Eye, high-speed camera, optimized for low-lighting and motion detection. Thanks to Alejo Duque for coming up with the idea and prototyping the setup.

Step 1 - Open it up, f**k warrany
Use a small screw driver and open up the case of the PS3eye. The screws are hidden under the small black caps, which can be snapped out easily. Twist open the casing and then unscrew the pcb from the rest of the case.

Step 2 - Remove the optics
Unscrew the small screws which hold the optical parts. Remove it completely and inspect it. The bottom part, obviously has a threaded interior, but sadly the top, optical part is usually glued into it. try scratching off the glue. otherwise carefulle cut through the bottom piece until you can snatch it open and remove the top, optics.

Step 3 - inversion of the optics and positioning
The easiest way to tranform the PS3eye into a microscope is by just flipping upside down the optics. Remount the bottom part back onto the pcb and just tape back the optics upside down on top of it. For different magnifications you can also readjust the position/distance of the optics to the chip. the included switch in the optics to choose 2 different field of views (FOV) turns out to be really useful for microscopy applications.

Step 4 - build a stable setup for inverted light microscopy
tba

DIY microscopy instructions

Introduction
close_up_DIY_microscopy

Simple Instruction
Step 1: Getting prepared...
simple_microscope_step1_getting_started

Step 2: Play with the lens!
simple_microscope_step2_repositioning_lens

Step 3: Screw the lens, flip the lens, look at a pixel
simple_microscope_step3_flipping_lens

Step 4: Build a practical and nice setup
simple_microscope_step4_simple_setups

Videos
Tardigrade couple recorded with 1.3 Megapixel webcam from TW, 20$

Tardigrade recorded with cheap 0.3 Megapixel webcam from TW, 5$

Blepharisma at highest magnification with cheap 0.3 Megapixel webcam from TW, 5$

Other models and setups
Step 1: Hack the webcam and unsrew the lens
DIY_microscopy_other_setup_part1

Step 2: Remount the lens with an opaque-black tube and build a setup
DIY_microscopy_other_setup_part2

1.3mpx_cam_middle_lens_6.1px_0.84mm

Examples of Resolution
HTC HERO, 3,2-Zoll TFT-LCD Touchscreen mit HVGA-Auflösung (320 x 480)
3.2 inch = 81.28 mm
45mm / 320px = 140 micron

field_of_view_calculations_cheapcam

diy_microscopy_contrastmodes_side

Human leukocyte cells (nucleus stain of chromosomes), effects of chromatic aberation
DNA_stain_cell_nuclei

Fluorescent microbeads, diameter 1.8 micrometer
microbeads_fluorescence_colors

Fun Experiments

Beads of Thermoplastic Polymer from Struers, diameter approx 20-50 micron.

dusjagr_in_microbead

Looking at stuff, tardigrades, butterflies and amoebae...

webcam_micro_images_new

first step in micro DNA injection

“To invent, you need a good imagination and a pile of junk.”

Thomas A. Edison
US inventor (1847 - 1931)

How to control a resistor (or a potentiometer) using Arduino

Many times I asked myself how to control my simple noise-electronic-circuits by a computer. Most of these instruments are hacked toys or small circuits on which i can either switch on and off an effect or change one by the use of a potentiometer.

potientiometers in circuitbent toy

and it would be great to have them played by a midi-clocked software or to create fancy high speed effects on the potis/resistors, which no human fingers could ever do.

So what we need is an Digital to Potentiometer/Resistor device.

arduino_resistor_control

The Arduino board suits perfect for that! because it already has several Digital-to-Analog inputs and outputs and vice-versa. There is many tutorials out there, but I couldnt find what i wanted.

So how can we use the Arduino's outputs to control a resistor?

The answer is pretty simple: we can use one of the PWD analog outputs to control an LED, which is situated next to a photoresistor.

LED photoresistor pair

The picture shows such an example. its generally better though to put it inside a opaque casing, tape or some shrinkable wire, but to show it here i have ommited the case.

Remember to put a resistor in series with the LED to keep it alive. Of course some tuning needs to be done, by choosing the right LED/photoresistor pair . There are really bright LEDs or cheap ones and the photoresistors have different ranges and finally also the distance and the casing are crucial.

Using any software to control the Arduino PWD output we can dimm the LED and thus we can now change the resistivity of the photoresistor.

I used PureData to control the arduino outputs. and made a simple patch to oscillate the resistivity of the photoresistor.

pd patch to oscillate the resistivity


finally i used the resistor in a very simple circuit using a CMOS chip (40106). by a resistor and a capacitor a square wafe oscillator can be built, where the resistance controls the pitch/frequency.

40106